


How to achieve the technique and recipe for round bread with a banneton?

Mastering the art of round banneton bread is not just a question of recipe; it is a real know-how that requires understanding and technique. In this article, we’ll explore in detail the key steps to making your round bread a success, from preparing the dough to placing it in the banneton, to baking it to perfection. Whether you’re a passionate baker or simply curious to improve your skills, these professional tips will transform the way you make bread.
Choosing the ideal banneton for round bread
The quality of banneton is essential for successful cooking of round bread. A good banneton not only ensures the desired shape, but also promotes proper fermentation of the dough. This guide details the criteria to take into account when choosing the perfect banneton for your round breads.
Materials used in making bannetons
Bannetons are made from different materials, each with their own advantages. The most common are thewicker and the compressed wood. Wicker is valued for its strength and ability to absorb moisture, which allows the dough to maintain a dry surface and develop a beautiful crust. Compressed wood, for its part, is an economical and lightweight option, well suited for those new to home baking.
Choice of size and shape
The size of the banneton should match the amount of dough you plan to bake. Typically, a banneton of 20 to 25 centimeters in diameter is suitable for 500 grams of dough, which is ideal for a standard round loaf of bread. Also check the depth of the banneton, which should allow the dough to show without overflowing.
The importance of the lining
Some bannetons are sold with a lining in fabric, often made of linen or cotton, which can be removed and washed. This liner helps prevent the dough from sticking and makes it easier to unmold the bread after rising. If you choose an unlined banneton, it may be necessary to flour it generously before each use to prevent the dough from sticking.
Banneton maintenance
Good maintenance practice will extend the life of your banneton. After each use, it is recommended to remove any remaining paste and allow it to air dry. Avoid washing it with water as natural materials like wicker can deteriorate. If cleaning becomes necessary, use a soft brush and a little warm water, then allow the banneton to dry completely before storing it.
Round Bread Bannetons FAQ
Can you use the same banneton for different types of bread?
Yes, a banneton can be used for various types of bread, as long as you respect its capacity and adjust it according to the size of the dough.
Check the strength of the materials and make sure it is well shaped, with no cracks or burrs that could snag the dough.
With proper care, a banneton can last for several years. Replace it only if it shows signs of deterioration that affects its performance.
Articles sur le même Sujet

Preparing the dough: keys to success
Selection of Ingredients
The success of a round bread dough begins with the rigorous selection of ingredients. For a bread that stands out for its texture and taste, it is essential to use high quality flour, preferably type T55 or T65, which offers good stability and excellent fermentation capacity. The water should be at room temperature so as not to slow down the rising process. The use of fresh yeast or active sourdough is crucial for optimal rising, while fine salt will reinforce the taste without compromising the structure of the gluten.
Kneading Technique
Kneading is a key step in preparing round bread dough. It develops the gluten, thus allowing the dough to be sufficiently elastic and to retain the gases emitted by the yeast. For effective kneading, mix the ingredients until a smooth consistency is obtained. homogeneous and soft dough. This process can take about 15 to 20 minutes by hand, or less if a mechanical mixer is used. Make sure the dough is neither too dry nor too sticky, adjust with small amounts of flour or water if necessary.
The First Lift
After kneading, the dough should rest and double in volume. This first rise is crucial, because it allows the dough to develop its flavor and texture. Cover the dough with a damp cloth or plastic wrap to prevent it from drying out. Leave to rest in a warm place, away from drafts, for about 1 to 2 hours. The right ambient temperature for optimal rising is around 24°C to 27°C.
Forming and Second Raising
Once the dough has doubled in volume, degas it by folding it on itself to expel excess carbon dioxide. Then form a regular ball to obtain the classic round shape of round bread. Place the ball of dough on a lightly floured baking sheet or in a banneton. Cover again and allow the dough to rise a second time, during which it should almost double in volume. This step is essential to obtain well-risen and fluffy bread.
Perfect Cooking
Preheat your oven to 230°C before adding the bread. To create a golden, crispy crust, it is recommended to add a heat-resistant container of water to the oven to generate steam. Bake the bread for approximately 30 to 35 minutes. Watch the color of the crust which should be uniformly golden, a sign that the bread is cooked through.
FAQs
What is the exact role of steam when baking bread?
Steam plays a crucial role at the start of cooking, it keeps the crust of the bread soft, which helps the bread rise properly without bursting. In addition, it contributes to the formation of a beautiful, shiny golden crust.
Can you replace yeast with sourdough?
Yes, it is entirely possible to replace the yeast with natural sourdough. This substitution will influence the texture and taste of the bread, providing more developed aromas and a slight acidity, characteristic of sourdough breads.
How do you know if bread is cooked enough?
Bread is generally done when the internal temperature reaches around 98°C. Another method is to tap the bottom of the bread; a hollow sound indicates the bread is cooked.
Articles sur le même Sujet
Shaping and first lifting: crucial steps
Importance of shaping in the manufacture of round bread
THE shaping is a fundamental step in the manufacture of round bread. This delicate process consists of giving the desired shape to the bread while developing the surface tension necessary for the dough to hold together well. For efficient shaping, it is recommended to lightly degas the dough after its first fermentation in order to expel the large accumulated carbon dioxide and obtain a finer and more uniform texture.
The baker must then round the dough into a ball by placing his hands on each side and gently rotating the dough on itself. This action creates a taut, smooth surface that traps air inside and promotes proper expansion during cooking. The goal is to achieve a perfectly round shape and a balanced gas distribution, essential to ensure a even cooking.
Techniques for an optimal first rise
The first rise, also known as proofing, is crucial for the development of the taste and texture of the bread. During this phase, the dough must be kept at a controlled temperature which generally varies between 24°C and 28°C. Humidity is also a key factor, with an ideal around 75%. These conditions favor yeast activity and the formation of new gas bubbles.
It is important to cover the dough with a damp cloth or place it in a closed container to prevent drying out. The duration of this rising can vary from 1 to 2 hours depending on the temperature and the recipe used. The volume of the dough should increase by almost double. A good score allows the dough to develop the aromas and texture desired for a bread of superior quality.
Control and adjustments during shaping and rising
During these stages, the baker must be vigilant. Shaping too vigorously can tear the dough and affect gas distribution, while undershaping may not allow the dough to develop its full flavor and volume. These processes should therefore be carefully monitored and adjustments made based on observations.
Make adjustments Careful and precise regarding temperature, time and humidity during rising is also crucial to the success of the bread. Each type of flour has its own water absorption characteristics, it is sometimes necessary to slightly modify the proportions of liquid or to adapt the duration of the pointing.
FAQs
- How important is temperature when proofing bread?
Temperature is crucial for controlling yeast activity. An optimal temperature allows the yeast to ferment at an ideal rate, which influences the texture, volume and flavor of the bread. - How do you know if the dough has risen sufficiently during the first rise?
Normally, the dough should have doubled in volume. A simple test consists of gently pushing a finger into the dough: if the imprint remains, the dough has risen sufficiently. - Can we speed up the rising if we are short of time?
Artificially accelerating the rise, for example by increasing the temperature, can negatively affect the quality of the bread. It is best to follow the recommended rising times for best results.
Articles sur le même Sujet
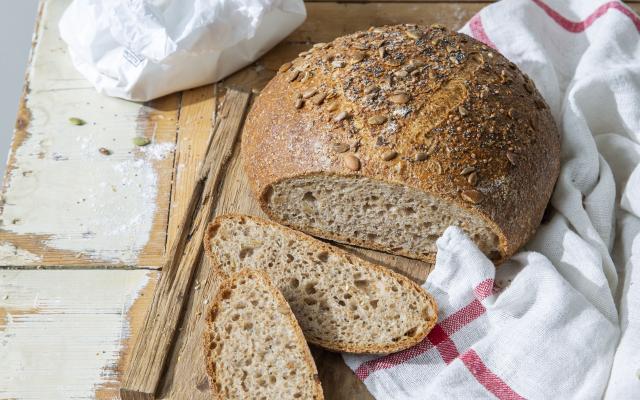

The art of using banneton for a perfect shape
The Basics of Round Bread: Choice of Material
When we talk about preparing a round bread, the appropriate use of a banneton is crucial to ensure not only an aesthetic shape but also an ideal structure and texture of the crust. The banneton, also called a proofing basket, is traditionally made of rattan, but can also be found in plastic or wood. This mold is particularly designed to support the dough during rising, giving it a regular shape and a superbly textured surface.
Be sure to choose the size and shape of the banneton according to the quantity of dough prepared. A banneton that is too big or too small could affect the shape and rise of the bread.
Dough Preparation and First Fermentation
The recipe begins with the preparation of the dough. Mix room temperature water with fresh or dry yeast, then gradually stir in the flour and salt. It is important to work the dough until it is smooth and elastic, which can take about 10 to 15 minutes of hand kneading. Then let the dough rest in a covered container, at room temperature, to allow the first fermentation, which generally lasts between 1 and 2 hours depending on the temperature of the room.
This step is crucial because it allows the dough to develop the first gas bubbles, essential for a honeycomb texture.
Preparing the Banneton and Forming the Bread
Before placing the dough in the banneton, it is essential to prepare it correctly to ensure that the bread does not stick. Flour the banneton generously with rice flour, which is excellent against sticking due to its absence of gluten. Next, transfer the dough to a lightly floured work surface and shape it into ball folding it under itself to form a smooth, taut surface.
Carefully place the dough in the banneton, smooth side down and folded side up. This will allow the dough to hold its shape while baking while absorbing the texture pattern of the rattan.
Second Fermentation and Oven Preheating
After forming, the dough must undergo a second fermentation in the banneton. Cover it with a damp cloth and let it rest in a warm place for about 1 hour, until it almost doubles in volume. Meanwhile, preheat your oven to 220°C (430°F) and place a roasting pan at the bottom of the oven to create steam, essential for obtaining a golden, crispy crust.
Just before baking, carefully invert the banneton onto a baking tray covered with baking paper to release the dough.
Cooking and Cooling
Score the top of the bread with a thin blade to allow the dough to expand during baking. Then place in the oven and add hot water to the grill pan to generate steam. Cook for 30 to 35 minutes until the bread is golden brown.
After cooking, leave your round bread cool on a rack to prevent condensation from softening the crust. This detail is essential to preserve the crispy texture that we all cherish.
1. Can we use a plastic banneton instead of a rattan one?
Yes, plastic bannetons are also effective, but they won’t provide the traditional pattern that rattan gives.
2. What is the best flour for preparing round bread?
An all-purpose wheat flour or a high protein wheat flour is ideal for good structure and rise.
3. How long does it take for bread to cool completely?
It is recommended to let the bread cool for at least an hour before slicing to allow the internal structure to stabilize.
Articles sur le même Sujet
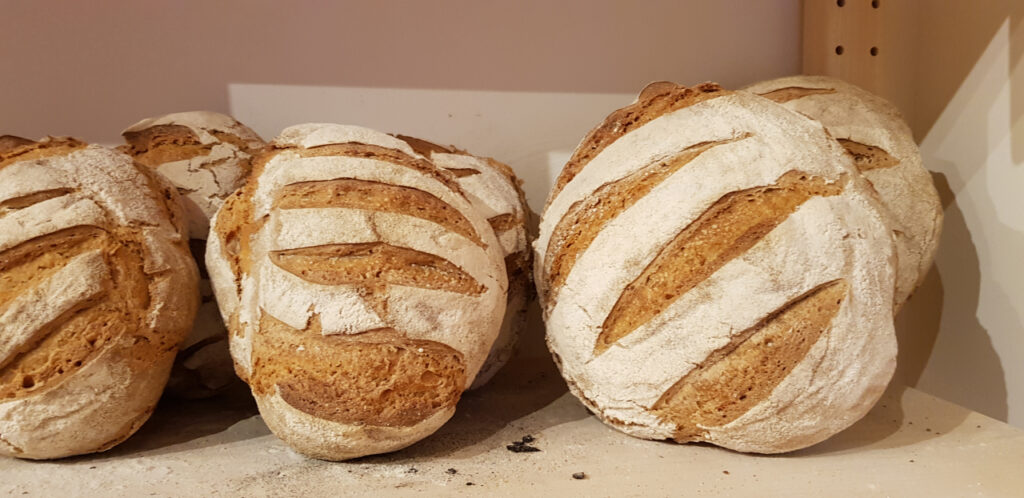
Cooking: optimal temperature and duration
The Basics of Preparing Round Bread
The realization of a round bread perfect depends largely on mastery ofbakery crafts, but also the precise use of techniques of cooking. To achieve a golden crust and an airy crumb, each step, from preparing the dough to baking, must be executed with care.
It all starts with the choice of quality ingredients. Good quality flour, water, yeast or sourdough, and a pinch of salt are the essential components. The quality of the flour, which is rich in gluten, is particularly crucial because it influences the dough’s ability to retain gases released during fermentation, which affects the texture of the bread.
Kneading and Proofing Techniques
Kneading the dough plays a vital role in the development of the gluten network. This allows the dough to stretch and retain the carbon dioxide bubbles produced by the yeast. Effective kneading should take at least 10 minutes by hand, or 8 minutes with a mechanical mixer, until the dough is smooth and elastic.
The rising phase is just as important. The dough should be left in a warm place, ideally between 24°C and 28°C, until it doubles in volume. This process not only promotes the formation of texture, but also the development of aromas.
Optimal Cooking Parameters
Baking round bread must be meticulous to obtain a perfectly crispy crust and a soft crumb. The optimal temperature for baking bread is generally 230°C. It is crucial to preheat your oven to ensure even baking from the moment you insert the bread.
Baking time varies depending on the size of the loaf, but an average of 30 minutes should be enough for a standard round loaf. Using a preheated pizza stone or baking sheet can help distribute heat evenly.
An often overlooked aspect ishumidity in the oven. For a professional result, place a heat-resistant container of water in the oven during preheating. The steam produced will help develop a shiny crust and thick.
FAQs on Baking Round Bread
How much yeast to use for round bread?
For a bread made with around 500g of flour, it is recommended to use between 5g and 10g of fresh yeast, depending on the desired temperature and rising time.
Should I always preheat my oven for baking bread?
Yes, preheating the oven is essential. This ensures that the heat needed for optimal baking is immediately available as soon as the bread is placed in the oven.
Is steam in the oven really necessary for all bread recipes?
Although not essential for all recipes, the use of steam when baking bread is recommended to improve the texture of the crust. It is particularly useful for breads with a thick, crispy crust.
Tips for unmolding bread and getting a nice crust
Preparing the Mold for Easy Unmolding
One of the crucial aspects for successful demoulding of a round bread is the proper preparation of the mold. It is recommended to use a mold with a removable bottom or a pastry ring to facilitate this process. Before placing the dough in the mold, it is essential to grease it generously with fat (butter or oil). For an added touch that prevents bread from sticking, lightly dust the pan with flour or cornmeal after greasing.
Baking Techniques for the Perfect Crust
Cooking is a decisive step in obtaining a golden and crispy crust. The use of a well-preheated oven is imperative. A high temperature (230-250°C) during the first minutes of cooking creates a nice crust, then lower the temperature (around 200°C) to allow the bread to cook through. Introducing a heatproof container of water into the oven generates steam, which helps develop a shiny, crisp crust while keeping the inside of the bread soft.
Effective Unmolding of Bread
After baking, it is essential to let the bread rest in its pan on a rack for a few minutes. This allows steam to escape and the crust to firm up slightly, making unmolding easier. To unmold, gently pass a thin, long blade (like a bread knife or spatula) between the bread and the edge of the mold to loosen the sides without damaging the crust. Then invert the pan and lightly tap the bottom and sides to release the bread.
FAQs
What is the best way to grease a round loaf pan?
It is recommended to use butter or oil. Generously apply the fat to the entire internal surface of the mold, then sprinkle with flour or semolina for additional protection.
At what temperature should you bake bread to get a nice crust?
Start cooking at a high temperature around 230-250°C for the first 10 minutes, then reduce to around 200°C for the remainder of the cooking time.
How long should you let bread rest before unmolding it?
It is advisable to leave the bread in its mold on a rack for at least 10 to 15 minutes after removing it from the oven. This allows steam to escape and the crust to firm up.